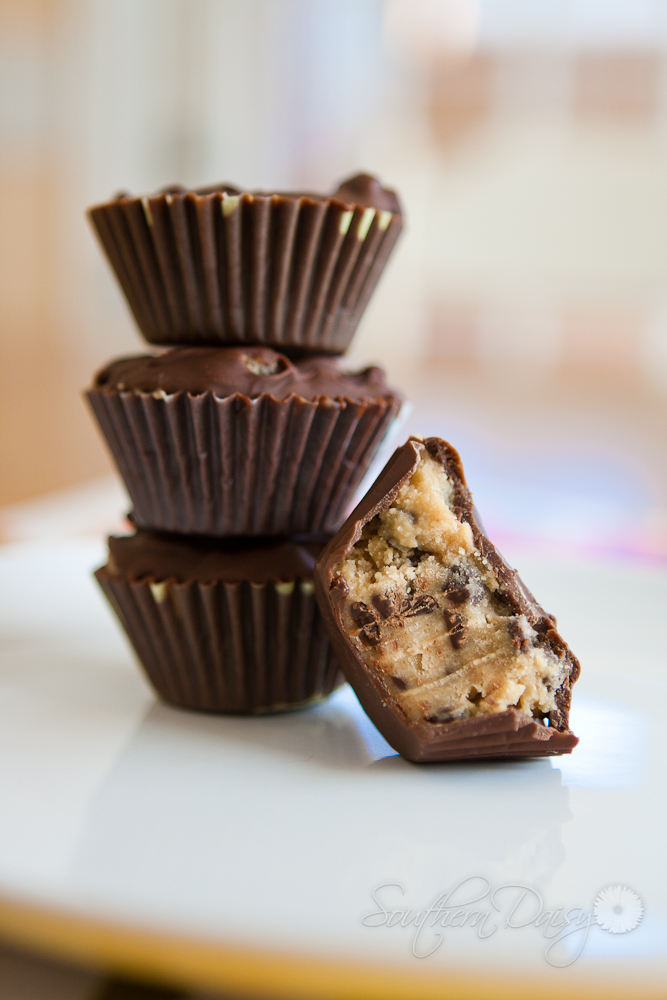
I subscribe to several food blogs, so every morning my inbox is full of new posts containing tons of recipes. Some I delete automatically, like if I see the word “mushroom” in the title, and others I just know that I want to try immediately. The following recipe was one of those “try immediately” ones, and I was glad I had an excuse to make it for our Bible Study instead of Steve and me having to eat them all. After I read through the blog post containing this recipe, which you can find over at How Sweet It Is, I immediately texted our small group leader to request that I be the one to make dessert this week.
These chocolate chip cookie dough peanut butter cups are SUPER rich, so make sure you have a glass of milk nearby while eating them.
Here’s what you’ll need: (makes 24, but I doubled the recipe to make 48)
- 2 1/2 cups milk chocolate chips
- 1/2 cup unsalted butter
- 1/3 cup packed brown sugar
- 1 teaspoon vanilla extract
- 1/4 cup creamy peanut butter
- 3/4 cup powdered sugar
- 2 tablespoons all-purpose flour
- 1/4 teaspoon salt
- 1/2 cup mini chocolate chips
Melt butter in a small sauce pan. Now remember that I doubled the recipe, so if you’re only making one batch you’ll melt just one stick of butter. I tried to take all the other pictures as if I was just making the one batch so you wouldn’t be confused, so just keep that in mind.
Scoop out 1/3 cup of tightly packed brown sugar. You’ll be amazed at how much more sugar you can get in the measuring cup after you press it down a bit.
Add brown sugar to the melted butter. Again, this shows my double batch. You’ll only want to use one 1/3 cup of brown sugar to make a single batch.
Stir brown sugar and butter together until the brown sugar dissolves and bring it to a boil. Let it boil for 1 – 2 minutes then remove from heat.
Add peanut butter to the hot brown sugar and butter mixture.
Stir in peanut butter until it’s completely blended.
Then stir in the vanilla and set aside to cool completely — about 15 – 20 minutes.
 Get out your mini muffin tin and add paper liners.
Melt milk chocolate either in the microwave (in a microwave safe bowl) or using the double boiler method. If you melt the chocolate in the microwave, make sure you only heat it in 30 second intervals, stirring in between each 30 second period.
Spoon about a teaspoon of chocolate into each paper liner and brush up the sides using a pastry brush. This might be easiest if you take the liners out while you’re brushing the chocolate up the sides.
Once you have all the liners coated in chocolate, pop the entire tray into the freezer for about 15 – 20 minutes.
Your peanut butter mixture should be cool by now, so pour it into a mixing bowl and add the powdered sugar.
Add salt.
Add the flour and mix everything together. You’ll want to start slow at first or you’ll end up with powdered sugar and flour all over yourself and your kitchen.
Add mini chocolate chips and gently stir or fold into the cookie dough.
The cookie dough will be a little too wet at this point, so stick it in the fridge for about 15 minutes so it has a chance to firm up.
Take your chilled, chocolate covered paper liners out of the freezer along with your chilled cookie dough.
Scoop cookie dough into the chocolate cups. I used a small cookie dough scooper, but you can use a spoon or whatever you have on hand. I found it best to not add too much cookie dough (just enough so it reaches the top of the cups) because you still have to cover them with chocolate.
Stick the filled cups back into the freezer for about 10 minutes, and in the mean time, melt some more milk chocolate.
Once the cups are chilled again, take them out of the freezer and spoon the melted chocolate over the top of each one so it’s as smooth as you can get it. You might want to melt more chocolate than you think need because I ended up not having enough when I got to the last couple cups. Unfortunately I forgot to take a picture of this step, so I apologize about that. Pregnancy brain!
Chill cups one more time so that the chocolate firms up and then they’re ready to eat!
I think it’s best to store these in the fridge too keep them as firm as possible until you’re ready to eat them. And don’t forget to have that glass of milk handy! You’ll definitely need it!
I hope you enjoy! I know I definitely did!
[yumprint-recipe id=’6′]


These are just WRONG. 😉 I’ve been dreaming about them since seeing Jessica’s post, too.
Oh my goodness!!!! Talk about decadent!! Make one for me when I come to visit, okay? 🙂