Blueberry Muffins

Every Thursday night, Steve and I participate in a Couples’ Bible Study, and each week we are assigned a food dish to bring for dinner.  I love it, because I never have to try to brainstorm about what to make for dinner on Thursday nights.  Each couple brings a dish, and we get to eat a ton of scrumptious food!

Tonight was “Breakfast Night” so I volunteered to make home made muffins.  I love breakfast for dinner, don’t you?  I made two different types of muffins: Blueberry and Strawberry.  The Blueberry were definitely the favorite, which is why I’m posting the recipe for them first, but I will post the Strawberry Muffin recipe later!

Note: I made this recipe incorrectly, but they still turned out great, so I’m just going to post it the way I made it.

Here’s what you’ll need:

  • 4 oz cream cheese, softened
  • 1/4 cup & 1/3 cup white sugar
  • 1/2 tsp lemon zest
  • 1/2 tsp vanilla extract
  • 2 eggs
  • 3/4 cup milk
  • 1/2 cup vegetable oil
  • 3 tsp baking powder
  • 1/2 tsp salt
  • 1 pint blueberries

Preheat the oven to 350°, then start by combining cream cheese and 1/4 cup sugar in a large mixing bowl.

Add the lemon zest.  I zested the lemon straight over the bowl and just kind of eyeballed the amount.

The key to zesting a lemon (or any citrus fruit for that matter), is to only zest the very outer layer of the peel.  You want the colored part, not the white part which is very bitter.  So make sure when you’re zesting, you don’t go too deep.

Add the vanilla extract.

Then add one of the eggs and mix until thoroughly combined.  This is the part I messed up on.  The original recipe told me to set this aside and prepare the dry ingredients.  What I didn’t know was that I was to keep it to the side and not combine it with the dry ingredients, which were going to be combined with another set of wet ingredients.  Anyway, I mixed everything together and it turned out just great, so you can either do it the way I did it, or you can keep this wet mixture to the side, and I’ll tell you when to add it later.

Mix flour, 1/3 cup white sugar, baking powder, and salt in a medium bowl.  Make sure it is completely combined and blended together.

Here’s where I messed up.  I added the rest of the wet ingredients to the wet ingredients from before, when I should have mixed them separately, but you can do whatever you want.

I added the other egg, the milk….

And the vegetable oil.  And mixed it so it was completely combined.

Then I turned my mixer on low and gradually added the dry ingredients to the bowl.

Once the wet and dry ingredients were completely combined, I added the blueberries.  I gave them a rough chop first so that some were cut in half and others left whole.

If you notice the small chunks of cream cheese around the side of the bowl, that’s what happens when you don’t let your cream cheese come to room temperature before you try to mix it.  So make sure you don’t add cream cheese straight from your refrigerator!

Add cupcake liners to your baking pan and pour the batter into the cups, stopping when they’re about 3/4 full.

Now, if you decided to try the recipe the way it was initially designed here’s how you’d do this.  You would fill the cupcake liners half full with batter.  Then you would spoon 1 teaspoon of that first wet mixture that you set aside right on top of the batter that you poured into the liners.  Finally, you would go back and add more batter until the cups were 3/4 full.  I’m not sure why the recipe was written this way, but it must be for a purpose, so if you’d like to try it that way, be my guest!  Otherwise, you can just fill the cups 3/4 full with the batter where you “mistakenly” combined all the ingredients together.

Hope that wasn’t too confusing.

Bake the muffins at 350° for 30 minutes.  Then let them cool in the pan for a few minutes before transferring them to a wire rack to cool the rest of the way.

Go ahead and take a bite of one before it is completely cooled.  It’s worth it!  A muffin straight out of the oven….yum!

Hope you enjoy these blueberry muffins!  Everyone seemed to like them at the Bible Study!

3 Bean Slow Cooker Chili

When we went to our best friends’ Super Bowl party a couple weeks ago, I was in charge of making the chili.  I’ve tried a few different recipes before and none really hit the nail on the head for me, but this 3-bean chili recipe I found in one of my slow cooker cookbooks really turned out great!

Here’s what you’ll need:

  • 2 pounds lean ground beef
  • 3 tsp chili powder
  • 1 small yellow onion, chopped
  • 2 cans (16 oz) Dark Red Kidney Beans
  • 2 cans (16 oz) Pinto Beans
  • 2 cans (15 oz) Black Beans
  • 1 can (14 1/2 oz) diced tomatoes
  • 1 can (6 oz) tomato paste
  • 1 1/2 tsp salt
  • 1 tsp garlic salt
  • 1/2 tsp black pepper
  • 1/2 tsp ground cumin
  • 1/8 tsp ground cinnamon


Add ground beef to a hot skillet and cook until browned.


While your meat is browning, chop up your onion into a small dice.


Transfer browned meat to a paper towel lined plate using a slotted spoon.


Then pour the remaining fat from the pan into a mason jar, or another heat proof container where you can let it cool and harden.


Look at all that fat that’s in the jar that could have ended up in your arteries!  Whenever I have to drain fat or grease like this, I add it to a jar, and just keep that jar sealed in one of my cabinets.  Then when the jar gets full I throw it away.  Keeps my drain from getting clogged.


Transfer meat to your slow cooker.


Add the diced onion to the meat.


Add the black beans,


Pinto Beans,


And kidney beans to the slow cooker.


Then add the diced tomatoes and tomato paste.  I used a can of diced tomatoes with bits of jalapeno to give it a little extra kick.


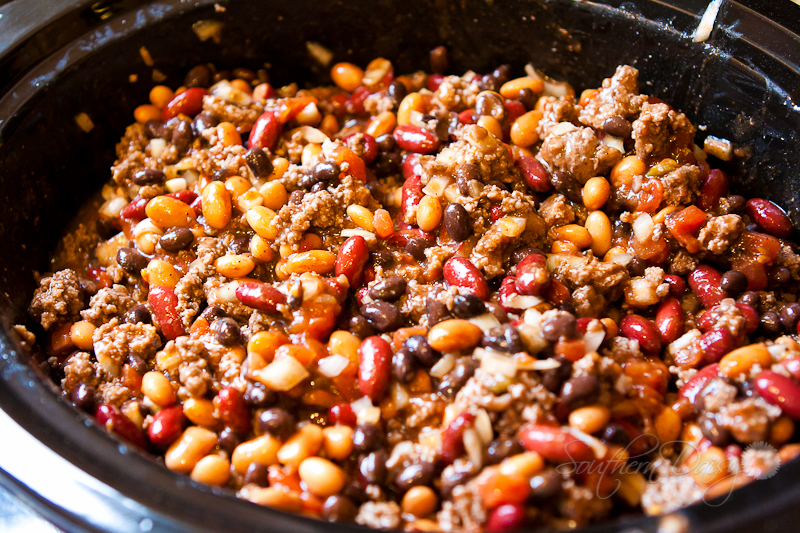
Then add salts, pepper, cumin and cinnamon.


Then stir it around so that everything is blended and mixed together thoroughly.

Cover and cook on Low for 3 to 4 hours or on High for 2 hours.

Unfortunately I don’t have a picture of the final product because we finished cooking the chili at our friends’ house, but hopefully you get the idea.  Enjoy!

Chicken & Black Bean Taquitos

Steve and I are part of a Couples’ Bible Study with several of our friends, and we’re studying the book His Needs, Her Needs by Willard F. Harley, Jr.  In the first couple chapters of the book it talks about making deposits and withdrawals in each other’s “Love Bank.”  While the group was discussing some of the chapter, I leaned over to Steve and quietly asked what I could do to make a deposit in his Love Bank.  He immediately answered, “Make dinner.”

I’m ashamed to say that lately I have been very lacking in the dinner making department.  I don’t know if it’s because I’ve been tired because of the pregnancy, or maybe I just got used to not making dinner when I was super nauseous for several weeks and I could only eat a very select variety of foods.  Either way, we have eaten out or ordered in more than I care to say in the past few months, and my husband has felt neglected because of it (even if he won’t come right out and say it).

So when he told me that making dinner would add to his Love Bank, I decided then and there that I would try make dinner every night, unless unforeseen circumstances or plans prevent me from doing so.

I’ve been looking up and trying out new recipes that I’ve never made before, and I thought I might as well share them with you along the way!  This recipe for chicken & black bean taquitos is adapted from a recipe I found on foodgawker.com, and it’s actually pretty healthy!

Here’s what you’ll need:

  • 2 boneless, skinless chicken breasts, cooked and shredded (each breast can make 2-3 taquitos, so plan accordingly)
  • 1 Tbsp ground cumin
  • 1 tsp cayenne pepper
  • salt and pepper
  • 1/2 cup chicken stock (or broth)
  • 1/3 cup black beans, drained
  • 1/4 cup roasted red peppers, sliced or diced
  • flour tortillas
  • cheddar cheese (freshly grated tastes the best)
  • cilantro

Start by adding cooked and shredded chicken to a medium skillet over medium high heat (drizzle some olive oil on the pan before adding chicken).


Add cumin, cayenne pepper, salt and black pepper to the chicken.


Give it a good stir so that the spices coat each piece of chicken.


Pour chicken stock into the pan.


Bring to a boil and let simmer until all the liquid has evaporated (about 5 minutes).


While chicken stock is simmering, add black beans to the skillet and give it a stir.


Once all the liquid has evaporated add roasted red peppers to the chicken and beans and stir to combine.


Heat tortillas in the microwave fore about 30 seconds to soften them.  Place a tortilla on a cookie sheet (I put foil down over the cookie sheet for easy cleanup).  Then add some freshly grated cheese down the middle of the tortilla.


Add some of the chicken and black bean mixture to the tortilla.  Remember that you’re going to be rolling these, so don’t over fill it.


Next add some chopped cilantro.  You can omit this step if you’re not a cilantro fan.  I, for one, am a HUGE cilantro fan, so of course I added it.


Roll the tortilla and set it on the cookie sheet seam side down.  You don’t want the tortilla to unroll on you!


Once you have all your taquitos rolled, place in a 425° oven for about 15 minutes, or until tortillas are golden brown and crispy.  Turn taquitos over after 10 minutes to let the other side brown up.


Serve taquitos with freshly made salsa or guacamole.  They’re delicious, and the crispy tortilla adds great texture!  Hope you like them as much as we did!