Pumpkin Cream Pie

Holy Cow!  It’s been over a month since my last post!  I have no excuse except for the fact that I haven’t really been feeling that well due to this baby growing inside my tummy.  I’ve had these pictures ready to share with you since a week before Thanksgiving, but as usual, I have been procrastinating.  That, and my darling husband does not like it when I upload pictures while he is playing his precious Call of Duty.  He plays with his friends online, and when I upload pictures onto my blog it makes his game lag.  Heaven forbid!

Well luckily, he’s watching football right now with his parents (they’re here visiting for Thanksgiving), so I have some time to write a blog post without Steve complaining about how slow his game is moving.

I made this twist on a traditional pumpkin pie a week before Thanksgiving for our Bible Study’s Thanksgiving Dinner.  It was the first time I made it, and it turned out great, and it got several thumbs up at the dinner.  So if you don’t really like traditional pumpkin pie, maybe you’ll like this version a little better.

Here’s what you’ll need:

FOR THE CRUST:

  • 1-1/2 package Graham Crackers (about 15 Cookie Sheets)
  • 1/2 cup Powdered Sugar
  • 1 stick Butter, Melted

FOR THE FILLING:

  • 1 box (3 Oz. Box) Vanilla Pudding (Cook And Serve Variety)
  • 1 cup Half-and-half
  • 1/2 cup Heavy Cream
  • Pinch Of Cinnamon
  • Pinch Of Nutmeg
  • Pinch Of Ground Cloves
  • 1/2 cup (plus 3 Tablespoons) Pumpkin Puree
  • 1/2 cup (additional) Heavy Cream
  • 2 Tablespoons Brown Sugar

Preheat oven to 300°.

Start by adding graham crackers to a food processor and pulse until finely crumbled.  If you don’t have a food processor, you can put graham crackers in a Ziplock bag and pound them with a meat mallet or something else that’s good at pounding things into little bits.


When graham crackers are crumbled into tiny bits, add powdered sugar and mix until completely combined.


Add crumb mixture to a bowl and pour in melted butter.


Mix butter in with a fork until all the crumbs are coated.  Then pour into a pie pan.


Press crust down either with your fingers or with the bottom of a cup (I find using the bottom of a cup to be the easiest method) so that it is tight against the side and bottom of the pie pan.

Bake for 8-10 minutes, or until pie crust is golden and set.  Set aside and cool completely.


Next take your vanilla pudding…..and chipping nail polish….


And pour into a sauce pan.  Doesn’t it look pretty?  Almost like sparkly snow.


Add half and half and cream to the pudding powder and stir until combined.


Add spices and continuously stir until the mixture comes to a bubble.  Once you have it bubbling, turn off the heat…..but keep stirring.


Next comes the main ingredient.  Pumpkin puree!!!


Stir in the pumpkin until thoroughly combined.  This may take a lot of stirring because the pumpkin can make the pudding a little lumpy, and you don’t want any lumps.

Once pumpkin pudding mixture is cool enough, cover and place in the fridge to cool completely.


Add heavy cream to a medium sized bowl.


Add some brown sugar to the cream.


Then whisk together until stiff peaks form……be sure to stop when it looks like this.  Otherwise, you can whisk it too much to where it will curdle, and then you’re halfway to butter.  Learned that one the hard way!


Add chilled pumpkin pudding mixture to the whipped cream.


Gently fold the whipped cream into the pumpkin pudding.  Be sure not to stir too progressively.  You want to fold in gently to keep the fluffy airy quality of the whipped cream.


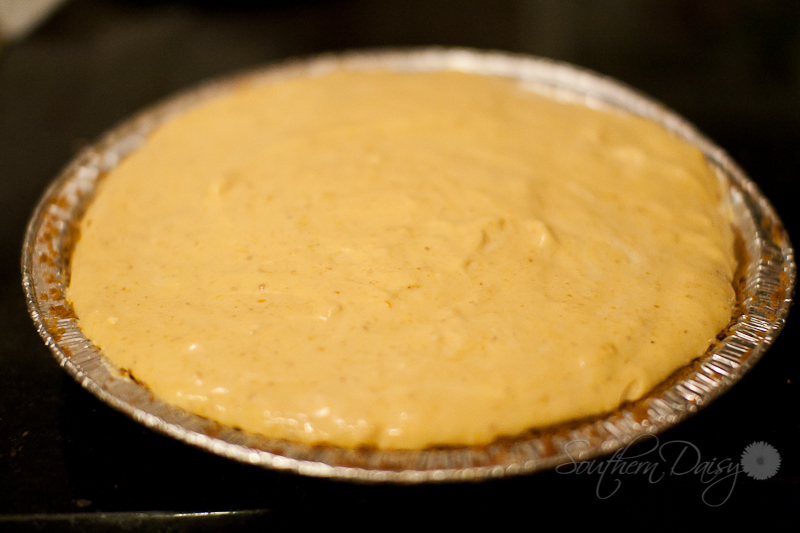
Pour filling into cooled pie crust.


Smooth filling so that it’s nice and even.  Then cover and chill in refrigerator for at least 3 hours.  If you have the time, it would be best to chill overnight.

Then slice up and enjoy!  You could add a little more crunch by adding some crushed graham crackers to the top of the pie once sliced.
Chocolate Peanut Butter Pie

Oh yes! The post you’ve all been waiting for!  Well, those of you who are my friends on facebook anyway.  Yesterday I posted an iPhone picture of the Peanut Butter Pie that I made for my husband’s birthday, and let me tell you, it was scrumptious!  I think I gained about 5 lbs just looking at it!  And from the noises our friends were making when they were eating it, I would say it was a hit.

I made this pie for the first time right after I read this post about another food blogger’s husband’s sudden passing.  It touched my heart, and that recipe looked too good not to make.  Plus, we were having some friends over that night, so I figured I would test the recipe on them.  Unfortunately I didn’t have all the ingredients I needed, such as semi-sweet chocolate chips (or so I thought….I later found a huge bag of them in my pantry), and I completely ruined the whipped cream by whipping it so much that it almost turned into butter, so I had to resort to whipped cream from a can.  Luckily, the second try turned out so much better, and here is the recipe and tutorial, so that you can also gain 5 lbs in one bite!

Here’s what you’ll need:

  • 8 oz chocolate cookies (I used Oreos®)
  • 4 tbsp butter, melted (1/2 a stick)
  • 4 oz finely chopped chocolate or semi-sweet chocolate chips
  • 1/4 cup chopped peanuts (unsalted)
  • 1 cup heavy cream
  • 8 oz cream cheese
  • 1 cup creamy-style peanut butter
  • 1 cup confectioner’s sugar
  • 1 can (14 oz) sweetened condensed milk
  • 1 tsp vanilla extract
  • 1 tsp lemon juice

Start by putting your cookies into a food processor.  I have a rather small food processor, so I had to do this in about 3-4 batches.  The bag of Oreos I got was 16oz, so I just used half of them to equal 8oz.  Of course if you want your crust a little thicker, you can add more accordingly.

Pulse until finely chopped with no big chunks left.  Then pour the crumbs into a medium bowl.

Melt butter, and pour over crumbs.

Use a fork to combine the butter and crumbs so that it is thoroughly saturated.

Press into a 9 inch spring-form pan so that the bottom is completely covered and flat, and press up the sides about an inch.

Put chocolate chips into a heat proof bowl and microwave to melt.  You can also use the double boiler method, but microwaving was faster.

Spread melted chocolate onto the crust.  Mine came apart a little, but that’s ok.  It might help if you refrigerate your crust, or put it in the freezer while you’re melting your chocolate so it has some time to set.

Add peanuts to the food processor and pulse until finely chopped.

Sprinkle a generous amount over the chocolate, and reserve some for the topping.  Refrigerate crust while you prepare the rest of the pie.

Add cream cheese and peanut butter to a stand mixer.

Mix on medium speed until light and fluffy.  Scrape down the sides of the bowl as needed.

Add confectioner’s sugar and stir on low at first until it’s combined, then you can increase the speed.  If you start out too fast, you’ll end up with sugar all over your kitchen.  Of course that’s never happened to me!

Next, add the sweetened condensed milk.

Vanilla Extract.

And lemon juice, and stir on medium speed until well combined.  You can use fresh squeezed lemon juice, but this is what I had on hand.

Pour heavy cream into a medium bowl.

Beat it with a hand mixer until it looks like this.  Do NOT keep going thinking it could be a little stiffer.  I made that mistake, and let me tell you, it was not pretty.  It started to curdle and separate and before I knew it, chunks of butter were starting to form.  It should be light and fluffy and not at all liquidy or chunky.

Add about 1/3 of the whipped cream to the peanut butter mixture and stir on low.

Gently fold in remaining whipped cream with a rubber spatula.  Do not mix it in with the mixer.  You want to keep it as light and airy as possible.

Here’s what it should look like when it’s all combined.

Pour peanut butter  filling onto the cold crust.

Smooth it out so it’s nice and pretty.

Drizzle some melted chocolate onto the top.  If you need the chocolate to be a little more runny, add a tablespoon of vegetable shortening, and melt in with the chocolate.  You can also add chopped peanuts to the outer edge of the pie to give it that fresh from the bakery look.  Steve said that it looked like a pie from Marie Callendars! 🙂

Refrigerate pie for at least 3 hours, but preferably overnight for best results.

When ready to serve, lift the bottom out of the spring form pan.  Isn’t that gorgeous!?

Serve it up, and enjoy!!!!  You may want to eat this with a glass of milk nearby.  It’s super rich!